A looooong title for a recurring question when you start developping a Windows Phone 7 Application.
It’s been a while since my last article (April 21, 2011! Wo!), but time is running so fast and I was very busy with several projects.
One of these was real live tracking in rally with WP7 and Bing Maps for the International Rally of Burgundy. See WP7 for tracking in Rallye on WPCentral for more details.
So go back to the subject of this article. I recently restarted the development of a WP7 application named Warnygo from scratch with Mango tools and I faced the same questions.
Reminder about NavigationService
As you know when you want to navigate from one view to another, you use the NavigationService like that:
NavigationService.Navigate(new Uri(“/View/MyPage.xaml?msg=hello”, UriKind.Relative));
In the target view, in the OnNavigatedTo method you use the NavigationContext to get your paremeter(s):
string msg = string.Empty; NavigationContext.QueryString.TryGetValue(“msg”, out msg))
Questions about the NavigationService
So this was the standard use of the NavigationService. There are two things I dislike here:
- I need to write the target view Uri every time I need to navigate to it. So one solution would be to write this uri in a static variable.
- I can’t pass a complex parameter to my target view. I’m stuck with the NavigationContext QueryString.
Two questions comes here:
- Can we navigate to a view without specifying its Uri every time?
- Can we navigate to a view passing a complex parameter?
The answer in image:

I must admit that I had prepared this one, but it was too tempting 🙂
Creation
For our needs we will create two interfaces to manage navigation with complex parameters:
namespace PhoneApp.NavigateToView.Core.Views
{
    public interface IView
    {
    }

    public interface IView<ViewNavigationParametersType> : IView
    {
        ViewNavigationParametersType NavigationParameters { get; set; }
    }
}
To navigate to a view without specifying the target view Uri, the trick is to create a custom attribute that we will use to decorate our views:
using System;

namespace PhoneApp.NavigateToView.Core.Views
{
    [AttributeUsage(AttributeTargets.Class | AttributeTargets.Interface, Inherited = false, AllowMultiple = false)]
    public sealed class ViewInfosAttribute : Attribute
    {
        private readonly Uri uriString;

        public ViewInfosAttribute(string uriString, UriKind uriKind = UriKind.Relative)
        {
            this.uriString = new Uri(uriString, uriKind);
        }

        public Uri Uri
        {
            get { return uriString; }
        }
    }
}
Now we need to create two NavigationService extensions to manager this new kind of navigation:
using System.Windows.Navigation;
using PhoneApp.NavigateToView.Core.Views;

namespace PhoneApp.NavigateToView.Core.Navigation
{
    public static class NavigationServiceExtensions
    {
        public static void NavigateToView<IView>(this NavigationService navigationService) where IView : Views.IView
        {
            Views.ViewInfosAttribute[] viewInfosAttribute = (Views.ViewInfosAttribute[])typeof(IView).GetCustomAttributes(typeof(Views.ViewInfosAttribute), false);
            if (viewInfosAttribute.Length == 1)
            {
                navigationService.Navigate(viewInfosAttribute[0].Uri);
            }
        }

        public static void NavigateToView<IView, ViewNavigationParametersType>(this NavigationService navigationService, ViewNavigationParametersType navigationParameters) where IView : Views.IView<ViewNavigationParametersType>
        {
            if (navigationParameters != null)
            {
                NavigatedEventHandler navigatedEventHandler = null;
                navigatedEventHandler = (s, e) =>
                {
                    ((IView<ViewNavigationParametersType>)e.Content).NavigationParameters = navigationParameters;
                    navigationService.Navigated -= navigatedEventHandler;
                };
                navigationService.Navigated += navigatedEventHandler;
                navigationService.NavigateToView<IView>();
            }
        }
    }
}
As you may notice, we are setting the view navigation parameters in the Navigated event. This event is triggered before the OnNavigatedTo in the target view.
Example of use
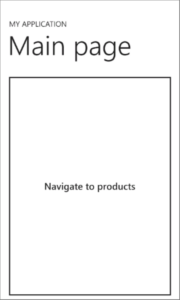
For the purposes of this article I have created a simple Windows Phone 7 solution (You can download it bellow) to show you how to use the two NavigationService extensions. In this solutions we have three views:
- The main view

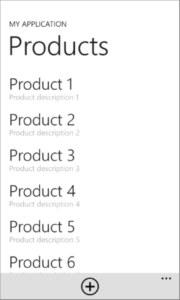
- A product list view

- A product details view

So, what looks like the main view code-behind?
using Microsoft.Phone.Controls;
using PhoneApp.NavigateToView.Core.Navigation;
using PhoneApp.NavigateToView.Core.Views;
using PhoneApp.NavigateToView.Views.Products;

namespace PhoneApp.NavigateToView.Views
{
    [ViewInfos("/Views/MainView.xaml")]
    public partial class MainView : PhoneApplicationPage, IView
    {
        public MainView()
        {
            InitializeComponent();
        }

        private void Button_Click(object sender, System.Windows.RoutedEventArgs e)
        {
            this.NavigationService.NavigateToView<ProductListView>();
        }
    }
}
As you see the view is decorated with our custom attribute named ViewInfos where we specify the view path.
When we click on the Navigate to products button we are calling the first NavigationService extension, because we simply need to navigate to the product list view, without parameters.
On the other hand, in the product list view we need to pass the selected product to the product details view.
Here is the product list view code-behind:
using System.Collections.ObjectModel;
using Microsoft.Phone.Controls;
using PhoneApp.NavigateToView.Core.Navigation;
using PhoneApp.NavigateToView.Core.Views;
using PhoneApp.NavigateToView.Models;
using PhoneApp.NavigateToView.Models.NavigationParameters.Products;

namespace PhoneApp.NavigateToView.Views.Products
{
    [ViewInfos("/Views/Products/ProductListView.xaml")]
    public partial class ProductListView : PhoneApplicationPage, IView
    {
        private ObservableCollection<Product> products;

        public ProductListView()
        {
            InitializeComponent();
            this.LoadProducts();
        }

        protected override void OnNavigatedTo(System.Windows.Navigation.NavigationEventArgs e)
        {
            base.OnNavigatedTo(e);
            this.DataContext = this.products;
        }

        private void ProductsListBox_SelectionChanged(object sender, System.Windows.Controls.SelectionChangedEventArgs e)
        {
            if (ProductListBox.SelectedIndex == -1)
                return;
            this.NavigationService.NavigateToView<ProductEditView, EditProductParameters>(new EditProductParameters { Mode = EditProductMode.Edit, Product = ProductListBox.SelectedItem as Product });

            ProductListBox.SelectedIndex = -1;
        }

        private void ApplicationBarIconButton_Click(object sender, System.EventArgs e)
        {
            this.NavigationService.NavigateToView<ProductEditView, EditProductParameters>(new EditProductParameters { Mode = EditProductMode.Create });
        }

        private void LoadProducts()
        {
            this.products = new ObservableCollection<Product>();
            for (int i = 1; i < 51; i++)
            {
                products.Add(new Product
                {
                    Id = i,
                    Name = "Product " + i,
                    Description = "Product description " + i
                });
            }
        }
    }
}
We are navigating to the product details view when the application bar button is clicked or when a product is selected. We specify that the navigation parameters type is EditProductParameters.
We can then use the navigation parameters in the product details view:
using Microsoft.Phone.Controls;
using PhoneApp.NavigateToView.Core.Views;
using PhoneApp.NavigateToView.Models;
using PhoneApp.NavigateToView.Models.NavigationParameters.Products;

namespace PhoneApp.NavigateToView.Views.Products
{
    [ViewInfos("/Views/Products/ProductEditView.xaml")]
    public partial class ProductEditView : PhoneApplicationPage, IView<EditProductParameters>
    {
        private EditProductParameters navigationParameters;
        public EditProductParameters NavigationParameters
        {
            get
            {
                return this.navigationParameters;
            }
            set
            {
                this.navigationParameters = value;
            }
        }

        public ProductEditView()
        {
            InitializeComponent();
        }

        protected override void OnNavigatedTo(System.Windows.Navigation.NavigationEventArgs e)
        {
            base.OnNavigatedTo(e);
            switch (this.NavigationParameters.Mode)
            {
                case EditProductMode.Create:
                    this.DataContext = new Product { Name = "New product", Description = "New product description" };
                    break;
                case EditProductMode.Edit:
                    this.DataContext = this.NavigationParameters.Product;
                    break;
            }
        }
    }
}
To go further
To make this article simple I didn’t use MVVM pattern. In fact in my own WP7 framework I didn’t created those two NavigationService methods as extensions. Initially it is two methods in my ViewModelBase so I can navigate from a ViewModel to a View. All this to say that you can use those extensions even if you are developing your application using MVVM pattern.
I’d like to add that the solution I give you here is not THE solution it is a way to answer this article main questions about the NavigationService.
Summary
We have seen how to Navigate from one view to another passing a complex object parameter without specifying the target view Uri in a Windows Phone 7 Application.
Isn’t that cool?! I mean, supposing that you are developer of course, because if you’re not you don’t give a sh** about that! 🙂
No, to be serious our code is way cleaner like that, isn’t it?
You can download the example solution here:
(Note that the project uses the Windows Phone SDK 7.1 Release Candidate)
As usual, if you have any questions about this article please feel free to contact me or leave a comment in the section bellow.
Super bonus of the day: Bindable ApplicationBar
Have you ever tried to bind the standard application bar? If yes, you know that unfortunately the standard application bar is not bindable… 
But wait! Don’t leave already!
The good new is that one of my colleague and friend Nicolas Humann has created a Bindable ApplicationBar just for you lucky guys 
And he has updated it to work with Mango!
Do no wait, check his website: http://blog.humann.info/
One reply on “Navigate from one view to another passing a complex object parameter without specifying the target view Uri in a Windows Phone 7 Application”
Just found this great tutorial! Thanks! That’s really helpful